
Thank you for purchasing one of our mounts, this set of instructions will guide you through the process of installing your mount to your van or trailer.
Smaller components, such as bolts, are in a brown paper bag in the box, please don’t throw it out with the packaging!
You will need to carefully unpack your mount, remember these are quite heavy.
Below are the parts for the Front Mount section inc floor mounting bolts.
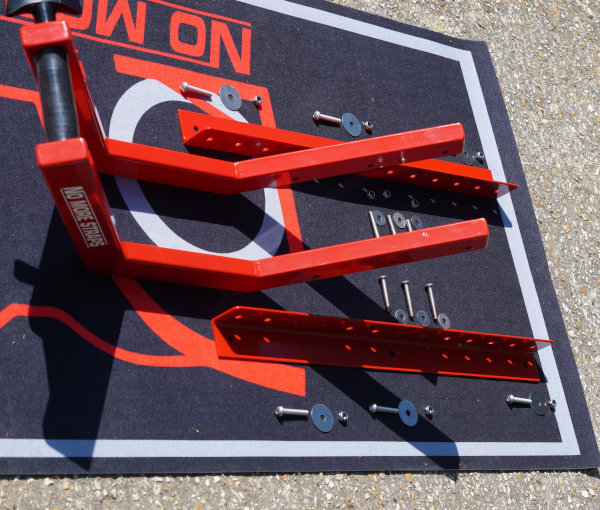
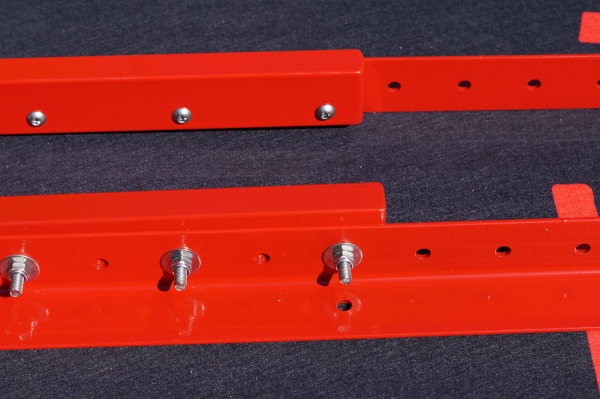
The two side fixing brackets have 13 holes on one face and 3 on the other. They are mounted to the floor using the three holes and the mount is fixed to the front wheel support using any 3 of the thirteen. When assembled they will look like the final photo. Be sure to put the heads of the bolts on the inside where your front wheel will go.
To fit the mount into the trailer or van simply position in the correct place, and then drill through the floor. Fix using M8 bolts.
The front mount should be mounted with 125mm (width of your tyre +5mm) between the arms.
Helpful Tips
The easy way to do this would be to cut 2 off cuts of wood at the desired width and use these to set the mount’s width adjustment in the correct place. We recommend you set the mount so you will have adjustment for longer and shorter wheelbase bikes.
We suggest that you setup the mount in the van or trailer first so you know it’s in the correct place for your bike, ensure you allow enough room for the *removable pin to be taken out.
Be careful that you don’t drill through wiring or pipes mounted under the floor!
The below image shows the heads of the bolts on the inside of the mount
Below are the parts for the Rear Mount section inc floor mounting bolts
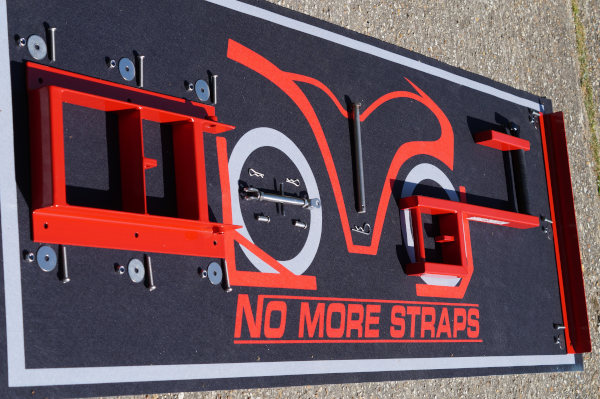
Mount the rear arm onto base as shown, using the pin and connect the turnbuckle to the base
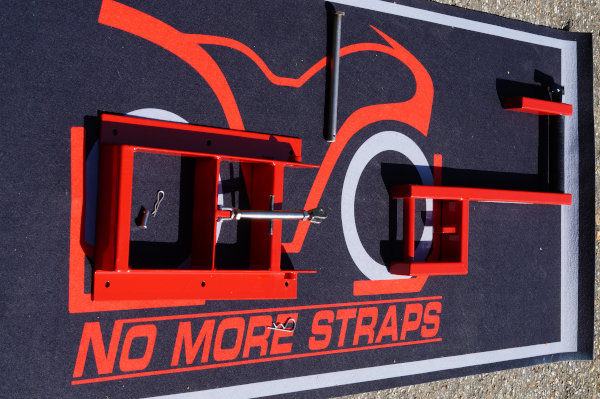
The mount is now assembled.
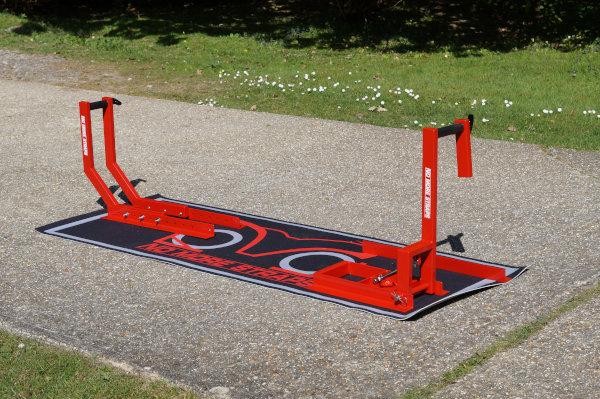
You will now be left with one part; this is the wheel guide and it is positioned 190mm from the wheel side of the rear mount.
Note When the mount is not too close to the back of your van or trailer you can simply drop the rear arm flat and run the bike over it to load and unload.
However we have designed the rear arm to remove easily should the arm impede the area the ramp needs to go. You will need to make sure when fitting the mounts that you position the guide rail slightly further forward thus allowing pin removal, ensuring the base of the tyre will still be within the guide rail when mount in use.
The mounts are supplied pre-lubricated and we only use quality components, however they will require maintenance.
Both of the black handles can be completely removed and the threads should be kept lubricated. We recommend this be done annually or more often if used regularly or where the mount is stored outside.
We recommend Copper Slip as a lubricant but standard grease can be used.
If you need advice at any time please contact us as follows:-
Email - support@nomorestraps.co.uk
Phone - 07889 558 654

